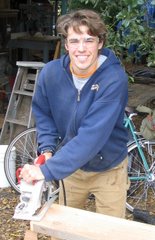
Here's a (rare) photo of me, cutting the template rafter:

And, as I was working, the Little Man himself, Harper, came out to help me. He's the two and a half year old son of one of my housemates, and he actually comes out to "help" me quite often, but this is the first photo I have of him, and man does he make pink look snazzy:

After cutting all nine rafters, Chris and I threw them up and attached them with standard hurricane ties:

Then, my friend Meredith came out and helped for two afternoons. Meredith, Chris, Dave, and I cut and attached blocking between the rafters, and then put on the roof decking. First cutting blocking for the ends of the rafters (Meredith cutting and Dave putting it up):

Then, Dave putting the roof decking on with the blocking in place:

I ended up using standard 3/4" tongue and groove plywood for roof decking. I would have preferred to use tongue and groove 2x6 (no formaldehyde offgassing), but that’s a lot of 2x6 to put up, and its pretty expensive stuff. Plus, the plywood was all 3x4 foot remnant sections that we already had lying around from another project, so it was free and wouldn't have been used otherwise. Also, I'm not too worried about that much plywood, since it should vent right to the outside (through the quasi-soffit vents) instead of into the building, and its pretty much the only thing that will offgass in my building.
Here's another photo of Dave putting it up:

That’s all for now, although significant progress has been made on roofing and preparing to attach the siding, but I'll save those photos for later.

No comments:
Post a Comment