Tuesday, March 18, 2008

32: One year retrospective

It's been about a year since I finished the TAJ, and I figured that along with adding a few photos of the finished product, I would give a very brief evaluation of the process and the end result.

If you've stumbled upon this blog for the first time, check out the posts from way back in the fall of 2006 for some background of the project. The rest of the posts illustrate how I went from this:


To this:


Ok, so here's my evaluation of the process: Overall I was extremely happy with how it went. There are a few things I would have changed - done a few more test mixes for the floor before laying the final layer, moved the bottom layer of siding up and inch, and been a little more careful with the earthbags in the foundation, but overall the process was a wonderful experience for me and I feel grateful that I was able to not jut partake, but lead and direct such an awesome project with such a great number of friends helping out. I think the look of amazement on the faces of all the people at the housewarming party was all the reward I needed, and then I got to live in it for six months to boot.

Furthermore, I think there is something extremely powerful about physically building something to provide shelter - it must be a hardwired, archetypal experience. On top of that innate satisfaction with building and creating, when you get a group of people who for the most part are students wholly accustomed to thinking about things rather than doing them, and get them in there working in the dirt, with their hands, creating, it makes it all that much more magical. I hope my project has inspired others - whether they participated or just watched - to undertake their own projects, be it building a house or something entirely different.

Lastly, I am extremely glad that I was able to incorporate so many ultra-sustainable techniques and practices into the TAJ. I think it made it a much more interesting project, but beyond that, I hope that all the people that have seen or heard about some aspect of what I did will think of the back when they are faced with a decision relating to creating sustainability, and that they will make the choice to try to do as best they can with whatever they are given.

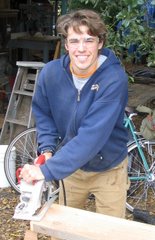
As for the product - I couldn't be dissatisfied with anything that I built for myself, as long as I knew that I had done my best. So, maybe the best way to evaluate the finished product is with a couple photos - one of myself, and one of my good friend Megan, who moved into the TAJ when I moved out, and is happily living there as I write this. I guess the smiles on our faces are all the evaluation that I need.


31: Finished photos

Ok, so here's a little more back story - I moved in to the TAJ last March, and lived in it through the end of November of this year. At the end of November I move up to Bend, Oregon where I now live. It was sad to leave behind the building I had built after living in it for only 6 months, but the point was never about the finished product, but rather about the process.

Building the TAJ taught me an incredible amount - about building, about sustainability, about teaching and leading, about managing a big, long-term project, about salvaging value from stuff others consider waste, and about how hard work and perseverance can really pay off.

It also made me realize how empowering it is to be able to build you're own house - even something as tiny as the TAJ. Here in Bend, where I'm now writing this from, I am just renting a place, but I don't anticipate doing this for very long - my next building project will hopefully be bigger, better, and soon. Ok, so here's the promised photos of the finished TAJ:

Porch and front two sides:


Electrical coming from the trench:


Underside of porch and exterior light:


Gutter on the backside of the house:


The footings of the porch rest on stones:


The suspension system for the bed:


The pulleys for the bed:


Hooks with jackets:


Closet full of stuff:

30: Door, built-in furniture and other finishing

Ok, so with my camera broken I wasn't able to take any photos of the rest of the process, and furthermore, without pictures to upload I neglected to keep this blog updated. To make a long story short, after finishing the floor by sealing it with boiled linseed oil, I installed the door, built and installed the furniture and put on a few additional finishing touches like windowsills and a little bit of trim (mostly the house is untrimmed).

Installing the door was pretty conventional, although the $300 salvage door handle I got for free gave me quite the headache, until I realized that the plunger that came with it wasn't the right plunger...

The furniture was pretty fun - I had never built any furniture before, so for the most part it was pretty simple and fairly rough. I put in a big desk, a bench for seating, a closet with built in shelves, and the bed. The bed is really the crown jewel of the furniture - it is a queen sized bed on a platform that I suspended on some extra spent climbing rope I had and with climbing pulleys it raises up to the ceiling during the day (with a full 7.5 feet of clearance under it), and then descends down to land on the bench and a foot for sleeping at night. The next post will have some photos of it. This part I did almost all by myself.

Then, I went through and (with help from Jeff and several other people) finished off the outside - putting on the second layer of siding, building a porch, installing the exterior light, trenching to bring permanent power out to the house, and putting on a gutter. Much of this part happened after I moved in.

The next post I make will have a bunch of photos of the finished house.

Thursday, March 29, 2007

29: Final floor layer

With the heating coil in place, it was time to jump back in the hole one more time to dig out and mix the final floor layer. This was going to be the thinnest and most wet layer yet, with a slightly increased amount of sand to hopefully prevent some of the cracking that had happened to the first finish layer.

Here's a photo of the wheelbarrows ready for the mixing:


And a bucket of the final mix with the last layer partially covering the heating coils:


The floor progressing:


The whole floor, after the first troweling, still extremely wet:


Another view:


After this I don't have any more good photos - my camera started having intractable technical problems, which was definitely a bummer. To finish off the floor, I went and troweled it smooth two to three times a day for the next 5 or 6 days. By that time it was clear that there were going to be some cracks that I was not going to be able to trowel out, so I dug out some of the most clayey earth from the hole, and pushed it through window screen material with my hands to form a thick, very smooth clay slip. This slip I troweled onto the floor in an extremely thin (less than a millimeter) layer, filling the cracks as I went, kind of like grout. I did this three times, and each time the cracks became smaller and less noticeable. After the third time I decided that it was good enough, since you could see the cracks only if you got down on your hands and knees to look. I let the finish floor dry for a couple more days and then started work on finishing the interior.

Wednesday, February 14, 2007

28: Heating Coil

After the first finished layer of the floor was dry to the point where it wouldn't stick to our shoes at all when we walked on it, it was time to lay the heating coil.

I had purchased 300 feet of the heating coil on ebay for about $40, and I don't doubt that it was made sometime in the 70s or 80s and had been lying around in someones garage or warehouse all this time. An internet search provided no information about the coil, much less the company that had manufactured it... But, it looked like it was in good working condition, and new electric radiant floor heating coils are five to ten times as expensive, so we proceeded to wire it up the only way we could think how and hope that it worked.

Fortunately a heating coil like this is an extremely simple thing - it takes 220 volt power, and you literally just connect one end of the coil to one of the hots on the 220 switch, and the other end to the other hot on the switch. When you flip the switch, electricity runs out of the switch, through the coil, and back to the switch. It creates heat by virtue of the fact that the wire is waaaaaay to thin for the amount of current that is being put through it, and the resistance causes heat.

The last thing I want to say about the heating was that after this experience with radiant floor heating, I am a HUGE fan of it and probably will not use any other heating in anything I build in the future (except a woodstove, of course). It is super-efficient, it keeps your feet warm, and you can keep the air temperature much lower and still be comfortable since you're not just getting convective heat transfer through the warm air, but also radiant and conductive heat transfer as well.

Here's some photos:

The heating coil pinned into the layer below with big metal staples:


The coil leads coming out of the wall:


The coil leads where the appear in the wall and where they will connect to the switches:


The thermostat and the switches (there are two heating zones on the floor, each controlled by a switch, and then the thermostat provides a master control. That way the zone under the bed can be turned off for the night to minimize EMF while sleeping):